
PLAN YOUR CONTENT
How to plan, create
and approve
your content.
Choose useful topics, give them dates and create branded posts for your channels. Review the results on your calendar and approve them when ready.
The workflowChoose your topics and timing, generate the content, then review and approve it.
- 01Plan
- 02Generate
- 03Approve
START WITH YOUR CONTEXT
Before you begin.
Check your brand, persona and connected social accounts. Your content goals, audience and writing preferences guide the suggestions and captions.
- Choose the right persona
Use the identity, expertise and voice you want this content to represent.
- Connect your channels
The planner shows the accounts available in your workspace.
- Look at your calendar
Leave room for existing content and listing campaigns.
Open Plan my content.
Open Create → Plan my content. Use the persona selector in the header to choose who you are posting as.
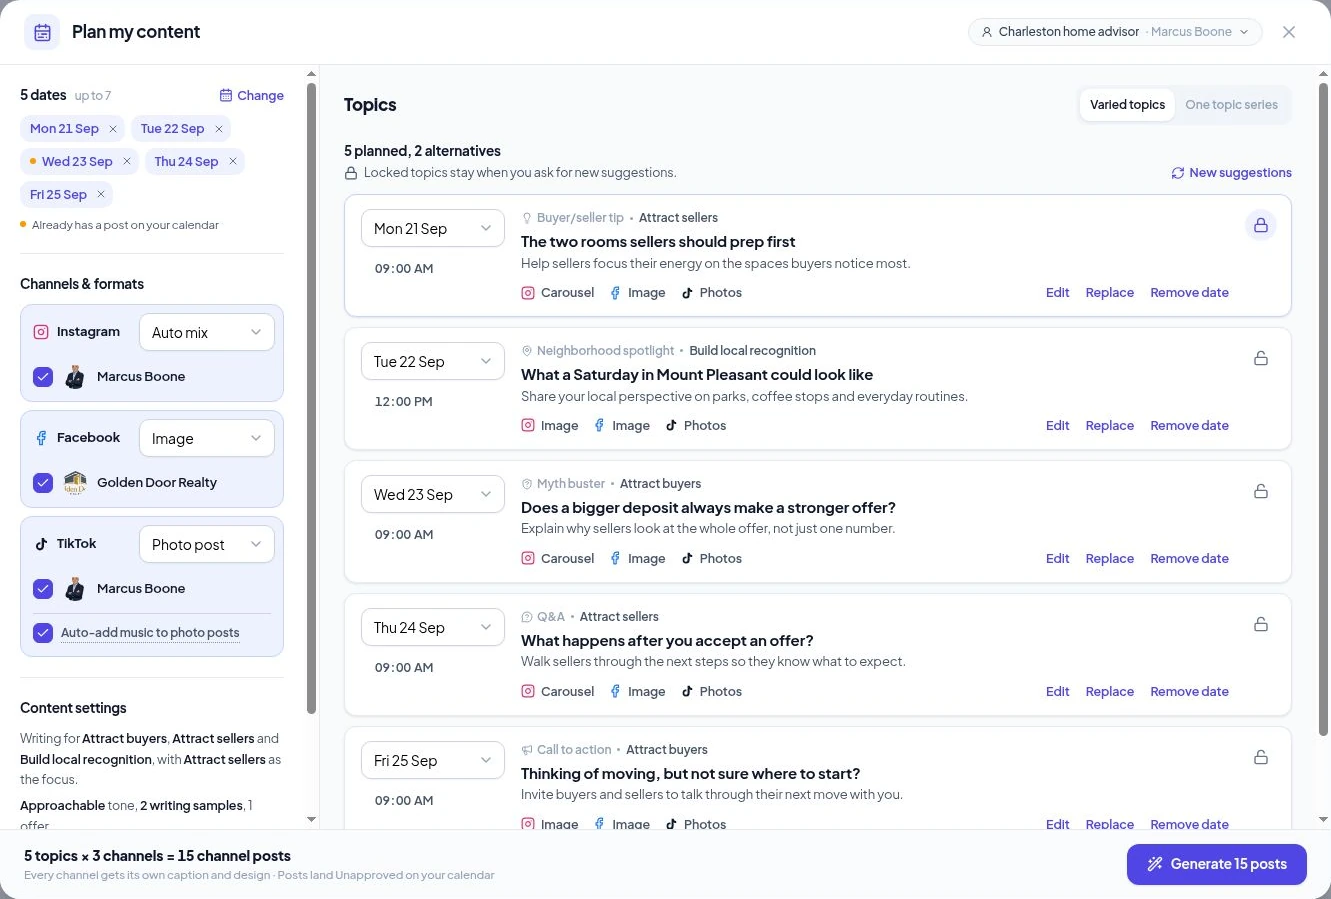
The planner brings your selected dates, channels, formats and topic suggestions into one view. Check the suggested plan and adjust it to fit your audience.
Next stepChoose your dates and channel formats.
Use Change in the date section to choose up to seven dates. They do not need to represent daily posting. A marked date tells you there is already a post on your calendar.
Select the social accounts you want to use. Choose a format for each platform: for example, Auto mix on Instagram, Image on Facebook and Photo post on TikTok. You can adjust the date and time beside each topic.
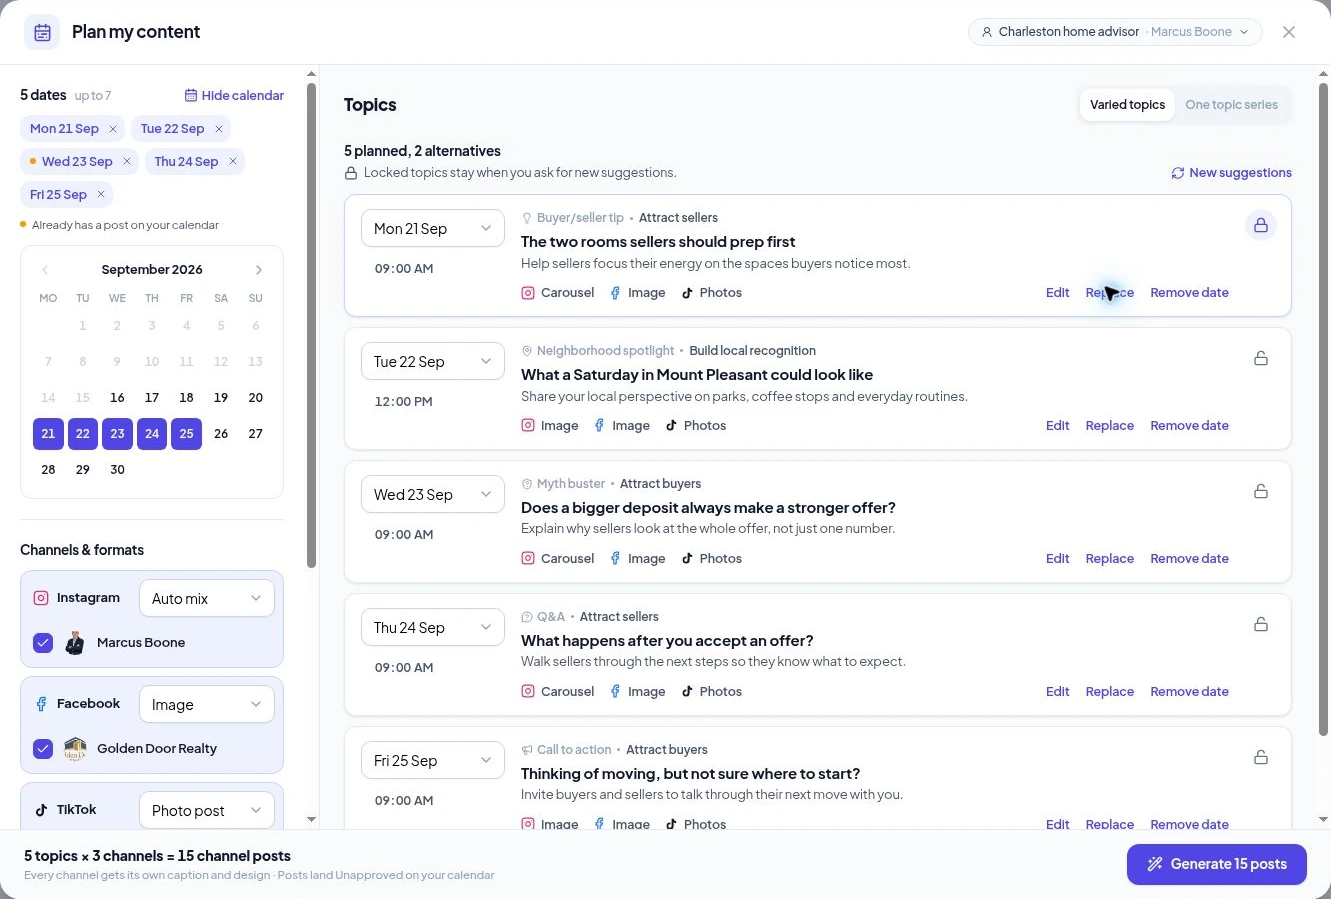
Formats follow your selected platforms. Reels and stories use separate creation flows.
Next stepMake the topics work for you.
Choose Varied topics for a mix, or One topic series and enter a theme to explore across your dates.
- Lock a favorite
Locked topics stay when you request New suggestions.
- Edit or replace
Change a title and its details, choose an alternative or ask for another suggestion.
- Bring your own idea
Choose Add my own topic, enter the title and optional details, and select a date. Save it to My topics if you want to reuse it.
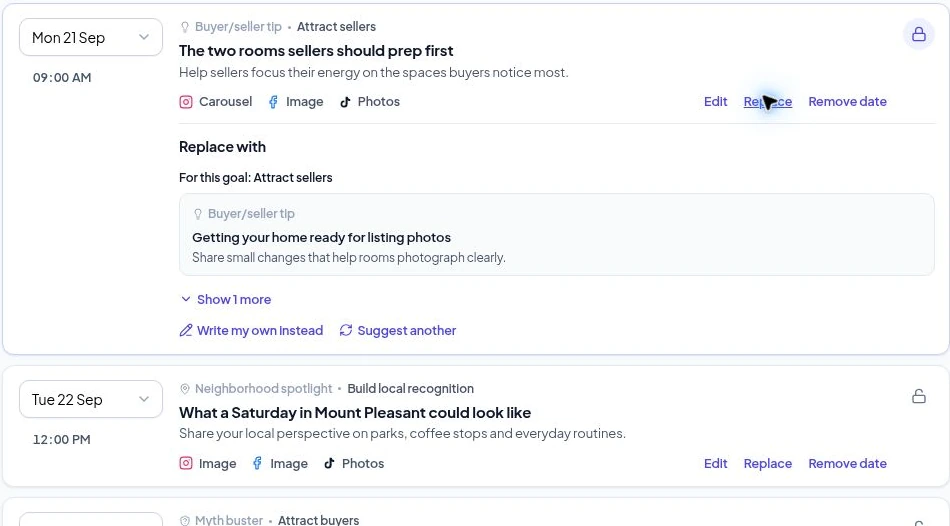
Adding a topic to an occupied date moves that date’s existing topic into your alternatives. Editing a topic onto another occupied date swaps the two dates.
Next stepGenerate the posts for your plan.
Check the count at the bottom. 5 topics × 3 channels = 15 channel posts. When your plan is ready, choose Generate 15 posts—the number changes with your selected topics and channels.
The planner closes and the calendar shows the batch as its captions and designs are prepared. Generated posts land Unapproved. This step does not approve them for publishing.
If the app flags a conflict, change the dates or choose Generate anyway after checking the existing posts.
Review, edit and approve.
Use Review posts in the calendar’s batch banner to work through the content. Check each caption, design, social account, date and time, and make any changes in the composer.
Approve ready posts individually, or choose Approve all when the batch is ready. Approved posts can publish at their scheduled times. Content you have not approved stays unpublished.
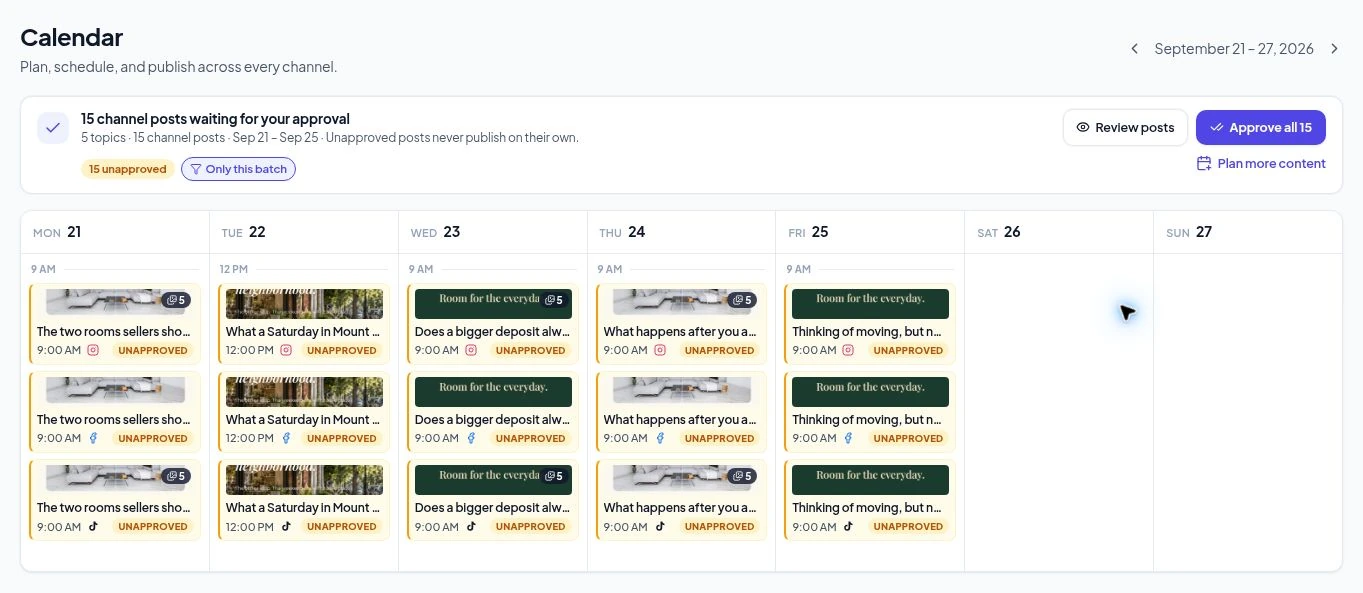
Use Only this batch to focus on the current set, or Plan more content to start another plan.
Continue to the final checksONE FINAL LOOK
Ready for your audience?
- The facts and wording are right
Check local details, names and advice. Add your own expertise where it helps.
- The branding fits
Review logos, contact details, the selected persona and each visual.
- The destination and time are correct
Check the account, date, time and workspace timezone before approval.
Open Create → Promote a listing for a single piece or a campaign. It shares the same calendar.
Follow the listing walkthroughYOUR QUESTIONS, ANSWERED
Questions about
your content plan.
The practical details before you get started.
Visit the FAQ hubDo I have to choose seven dates?
Does Generate approve or publish the posts?
How do I keep a topic when refreshing the suggestions?
Can I plan one topic as a series?
MAKE MORE TIME FOR YOUR CLIENTS
Your next plan
starts here.
Turn your expertise into content your audience can use.